Business Owner Guide
Learn how to set up and manage your company, branches, and staff.
1. Getting Started
- 1
Register your account and verify your email.
- 2
Complete your company profile in settings.
- 3
Select a plan that fits your business needs.
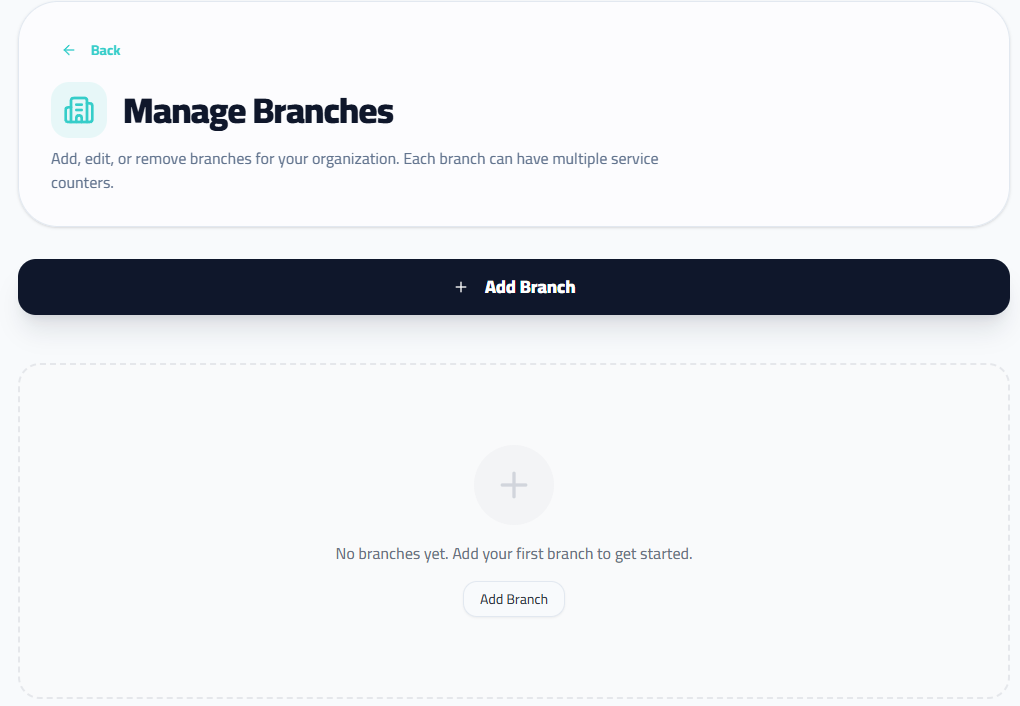
2. Managing Branches
Add physical locations for your business. Each branch holds its own queue and service counters.
- 1
- 2
Click 'Add Branch'.
- 3
Enter the branch name (e.g., 'Main Office').

- 4
Click 'Add' to create the branch.
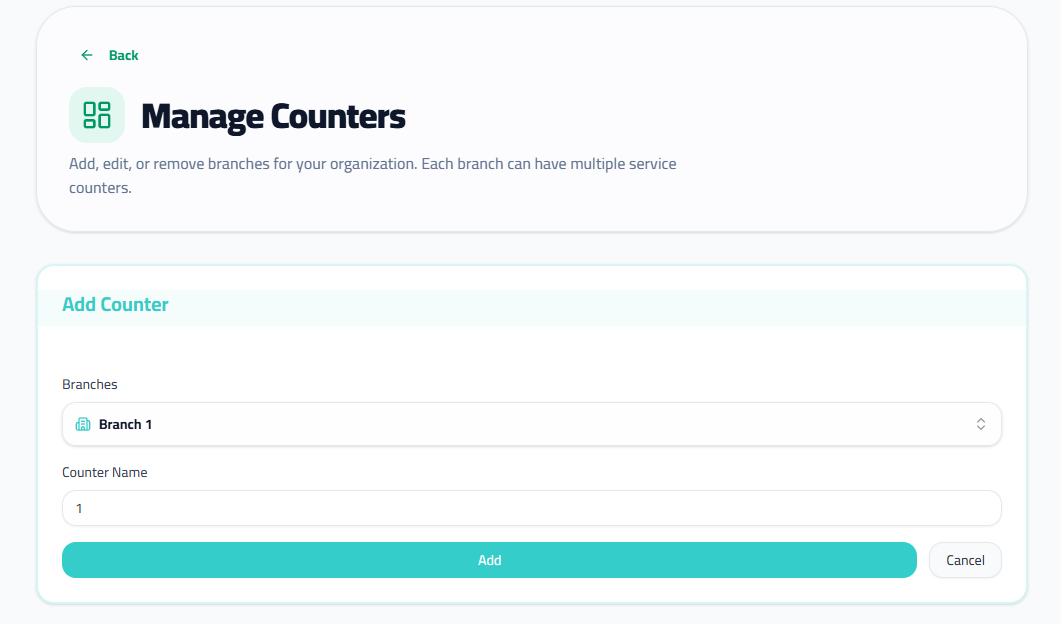
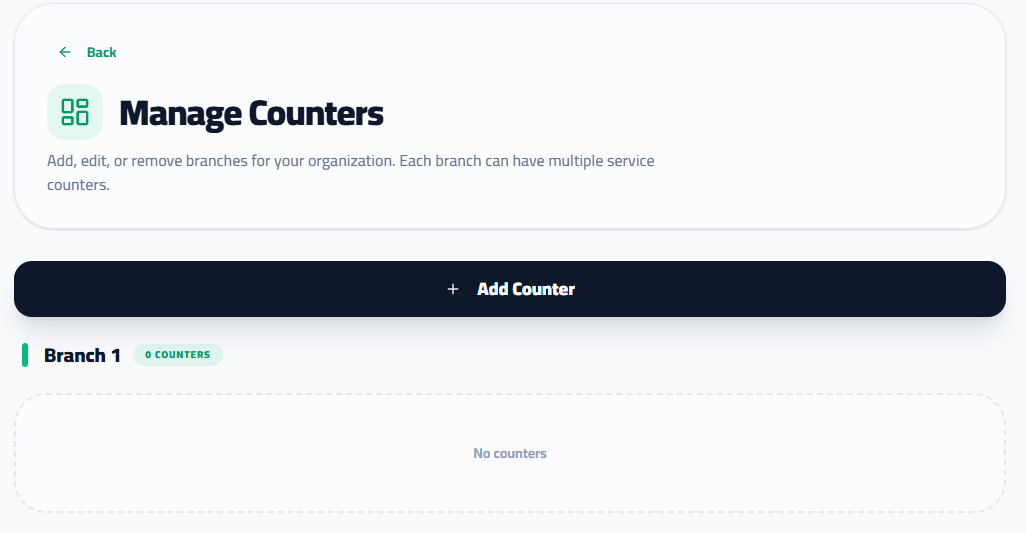
3. Service Counters
Create counters (windows/desks) for each branch to serve customers.
- 1
- 2
Select branch to add counter to and enter a name or number (e.g., '1').
- 3
Click 'Add' to create the counter. Repeat for all counters.
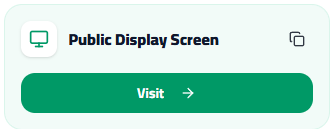
4. Public Display (TV)
Connect a screen to show the waiting list and current ticket to customers.
- 1
- 2
Click 'Display Link' button to copy url or the button to open the display in a new tab.
- 3
Open this link on your Smart TV or computer browser connected to the screen for customers.

- 4
The screen will now automatically show called numbers.
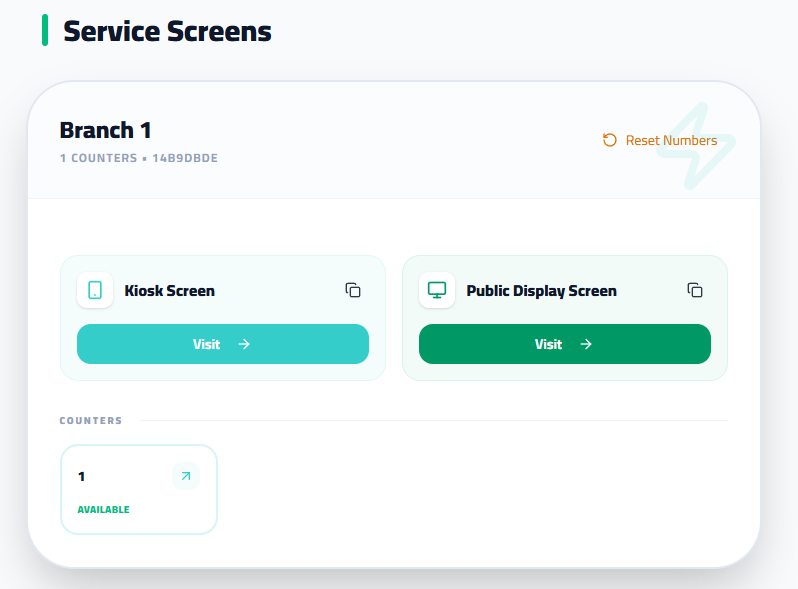
5. Customer Kiosk & Mobile Queue
Set up the customer-facing interface for ticket issuance.
- 1
Open the Kiosk page for your branch from the dashboard.
Go to Branches - 2
Recommendation: Use a touch device (iPad/Tablet) and connect a thermal printer for physical tickets.
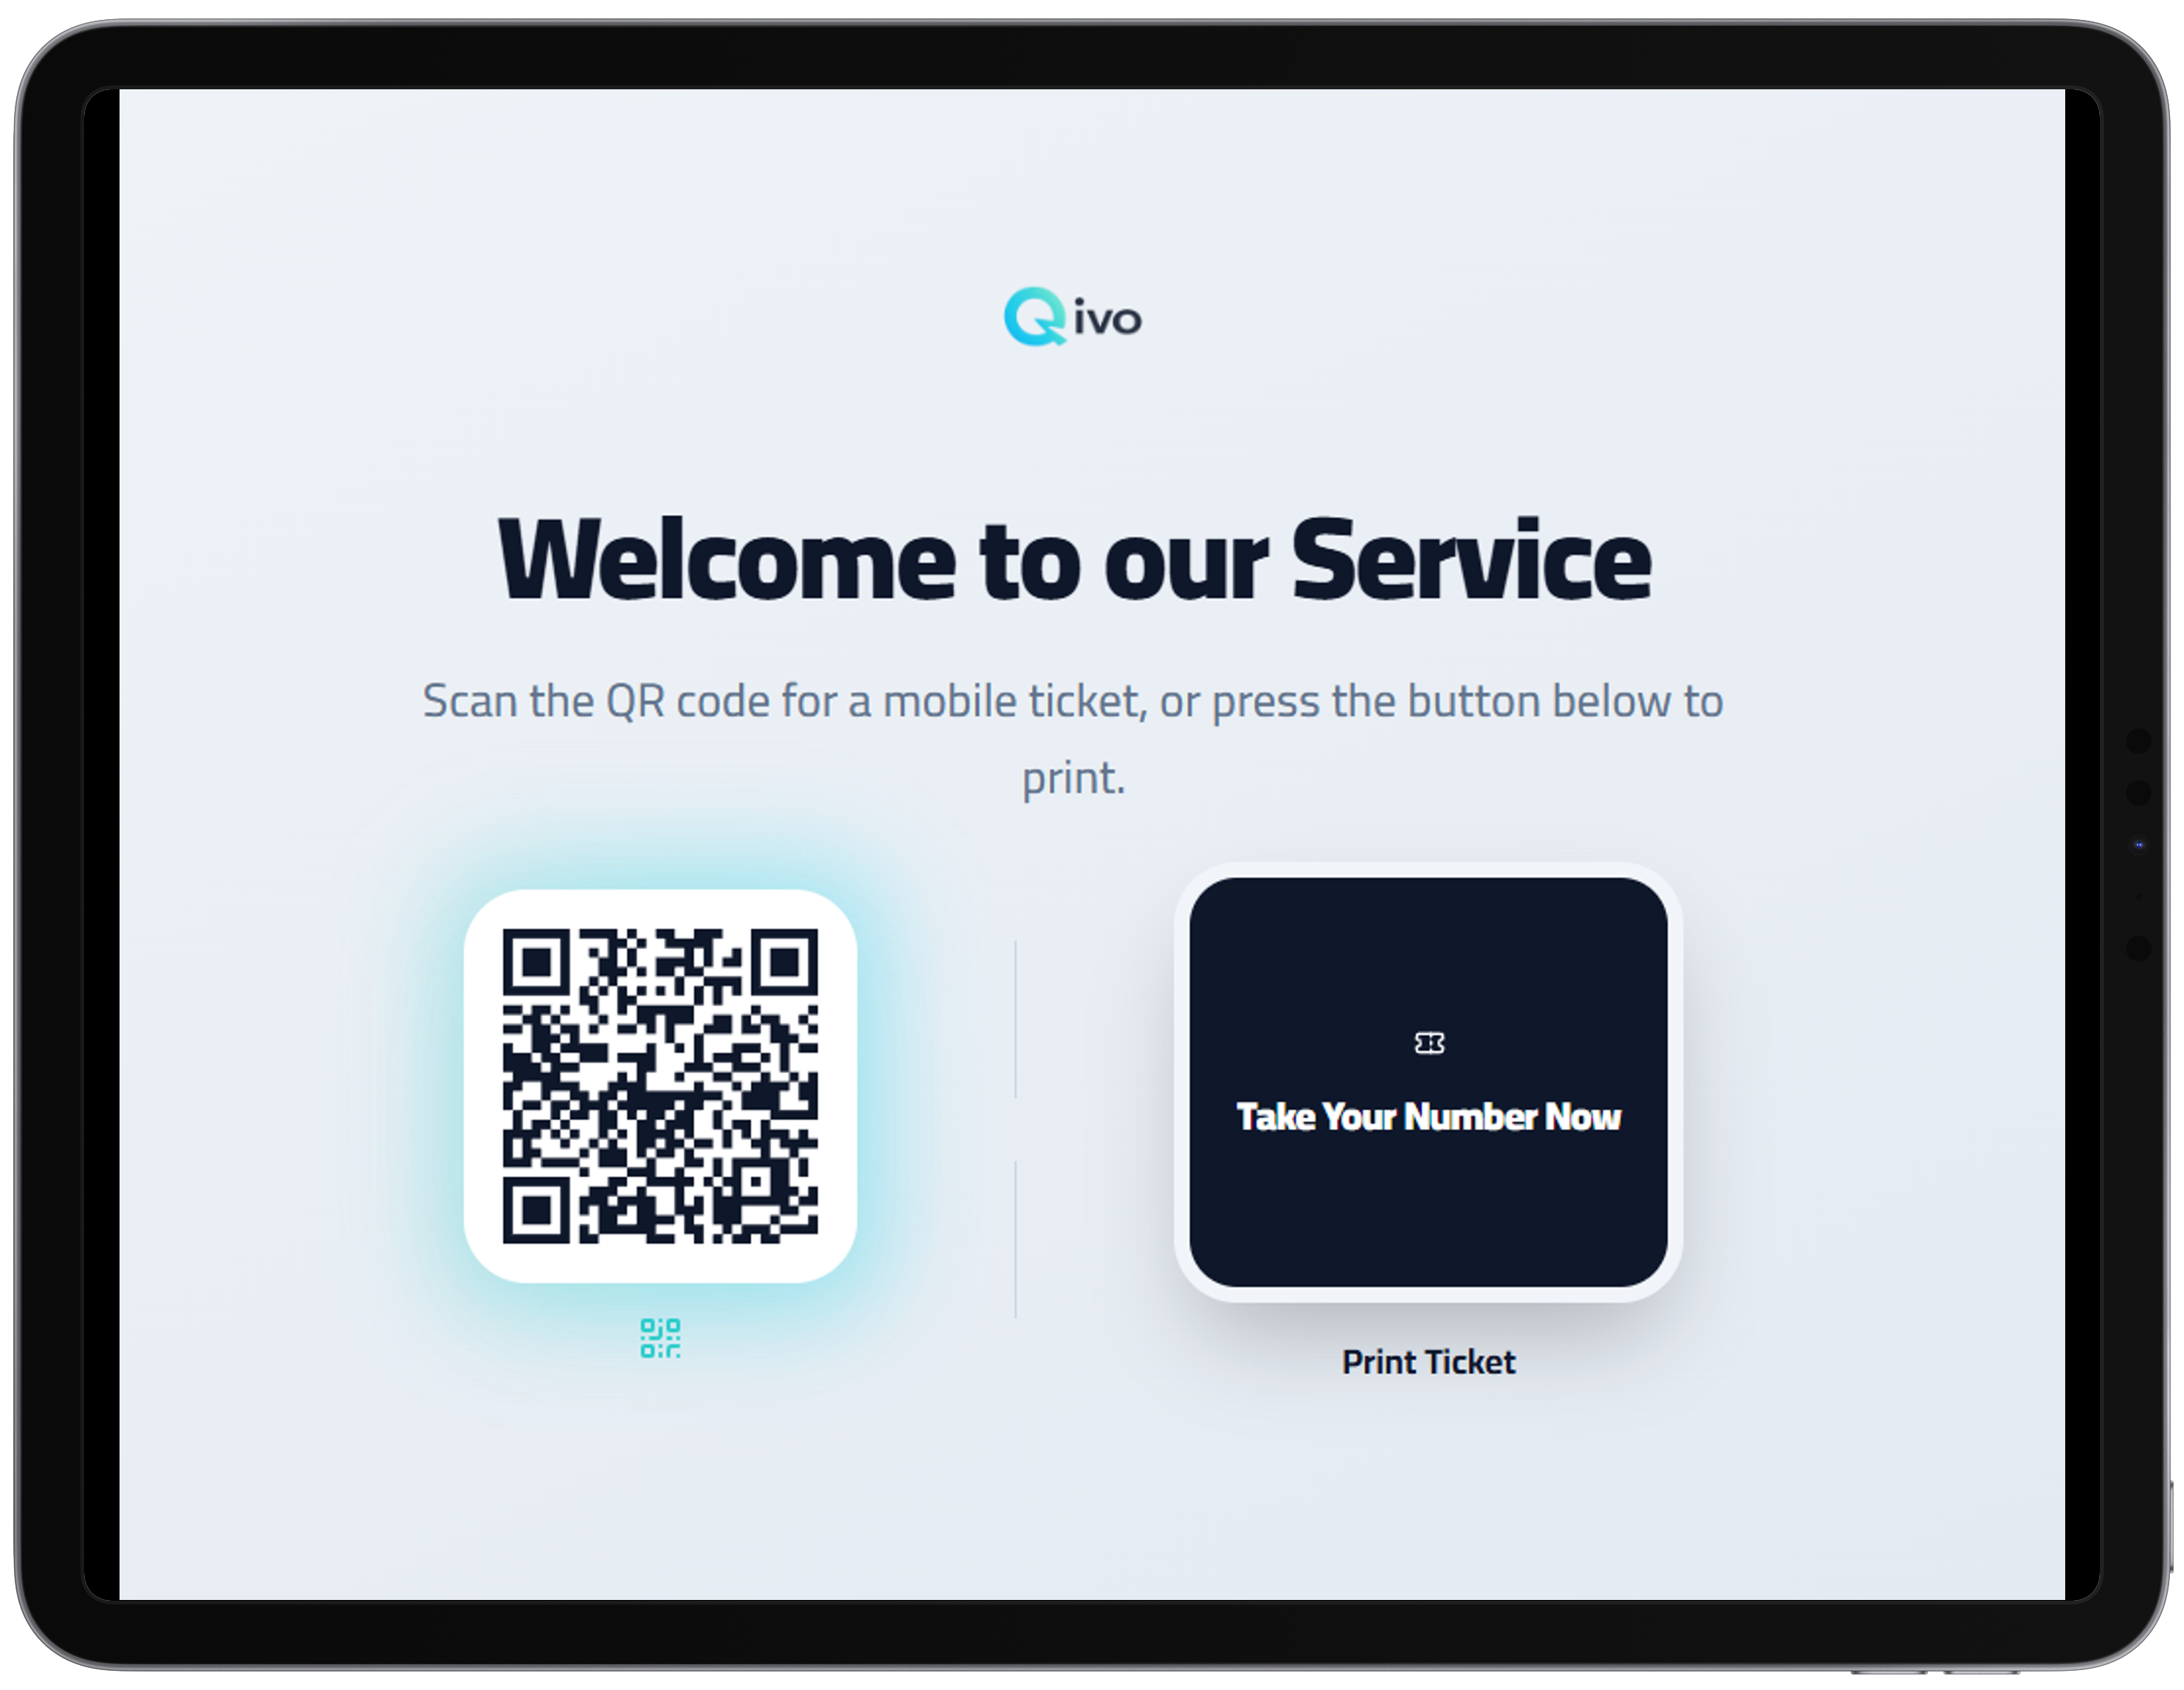
- 3
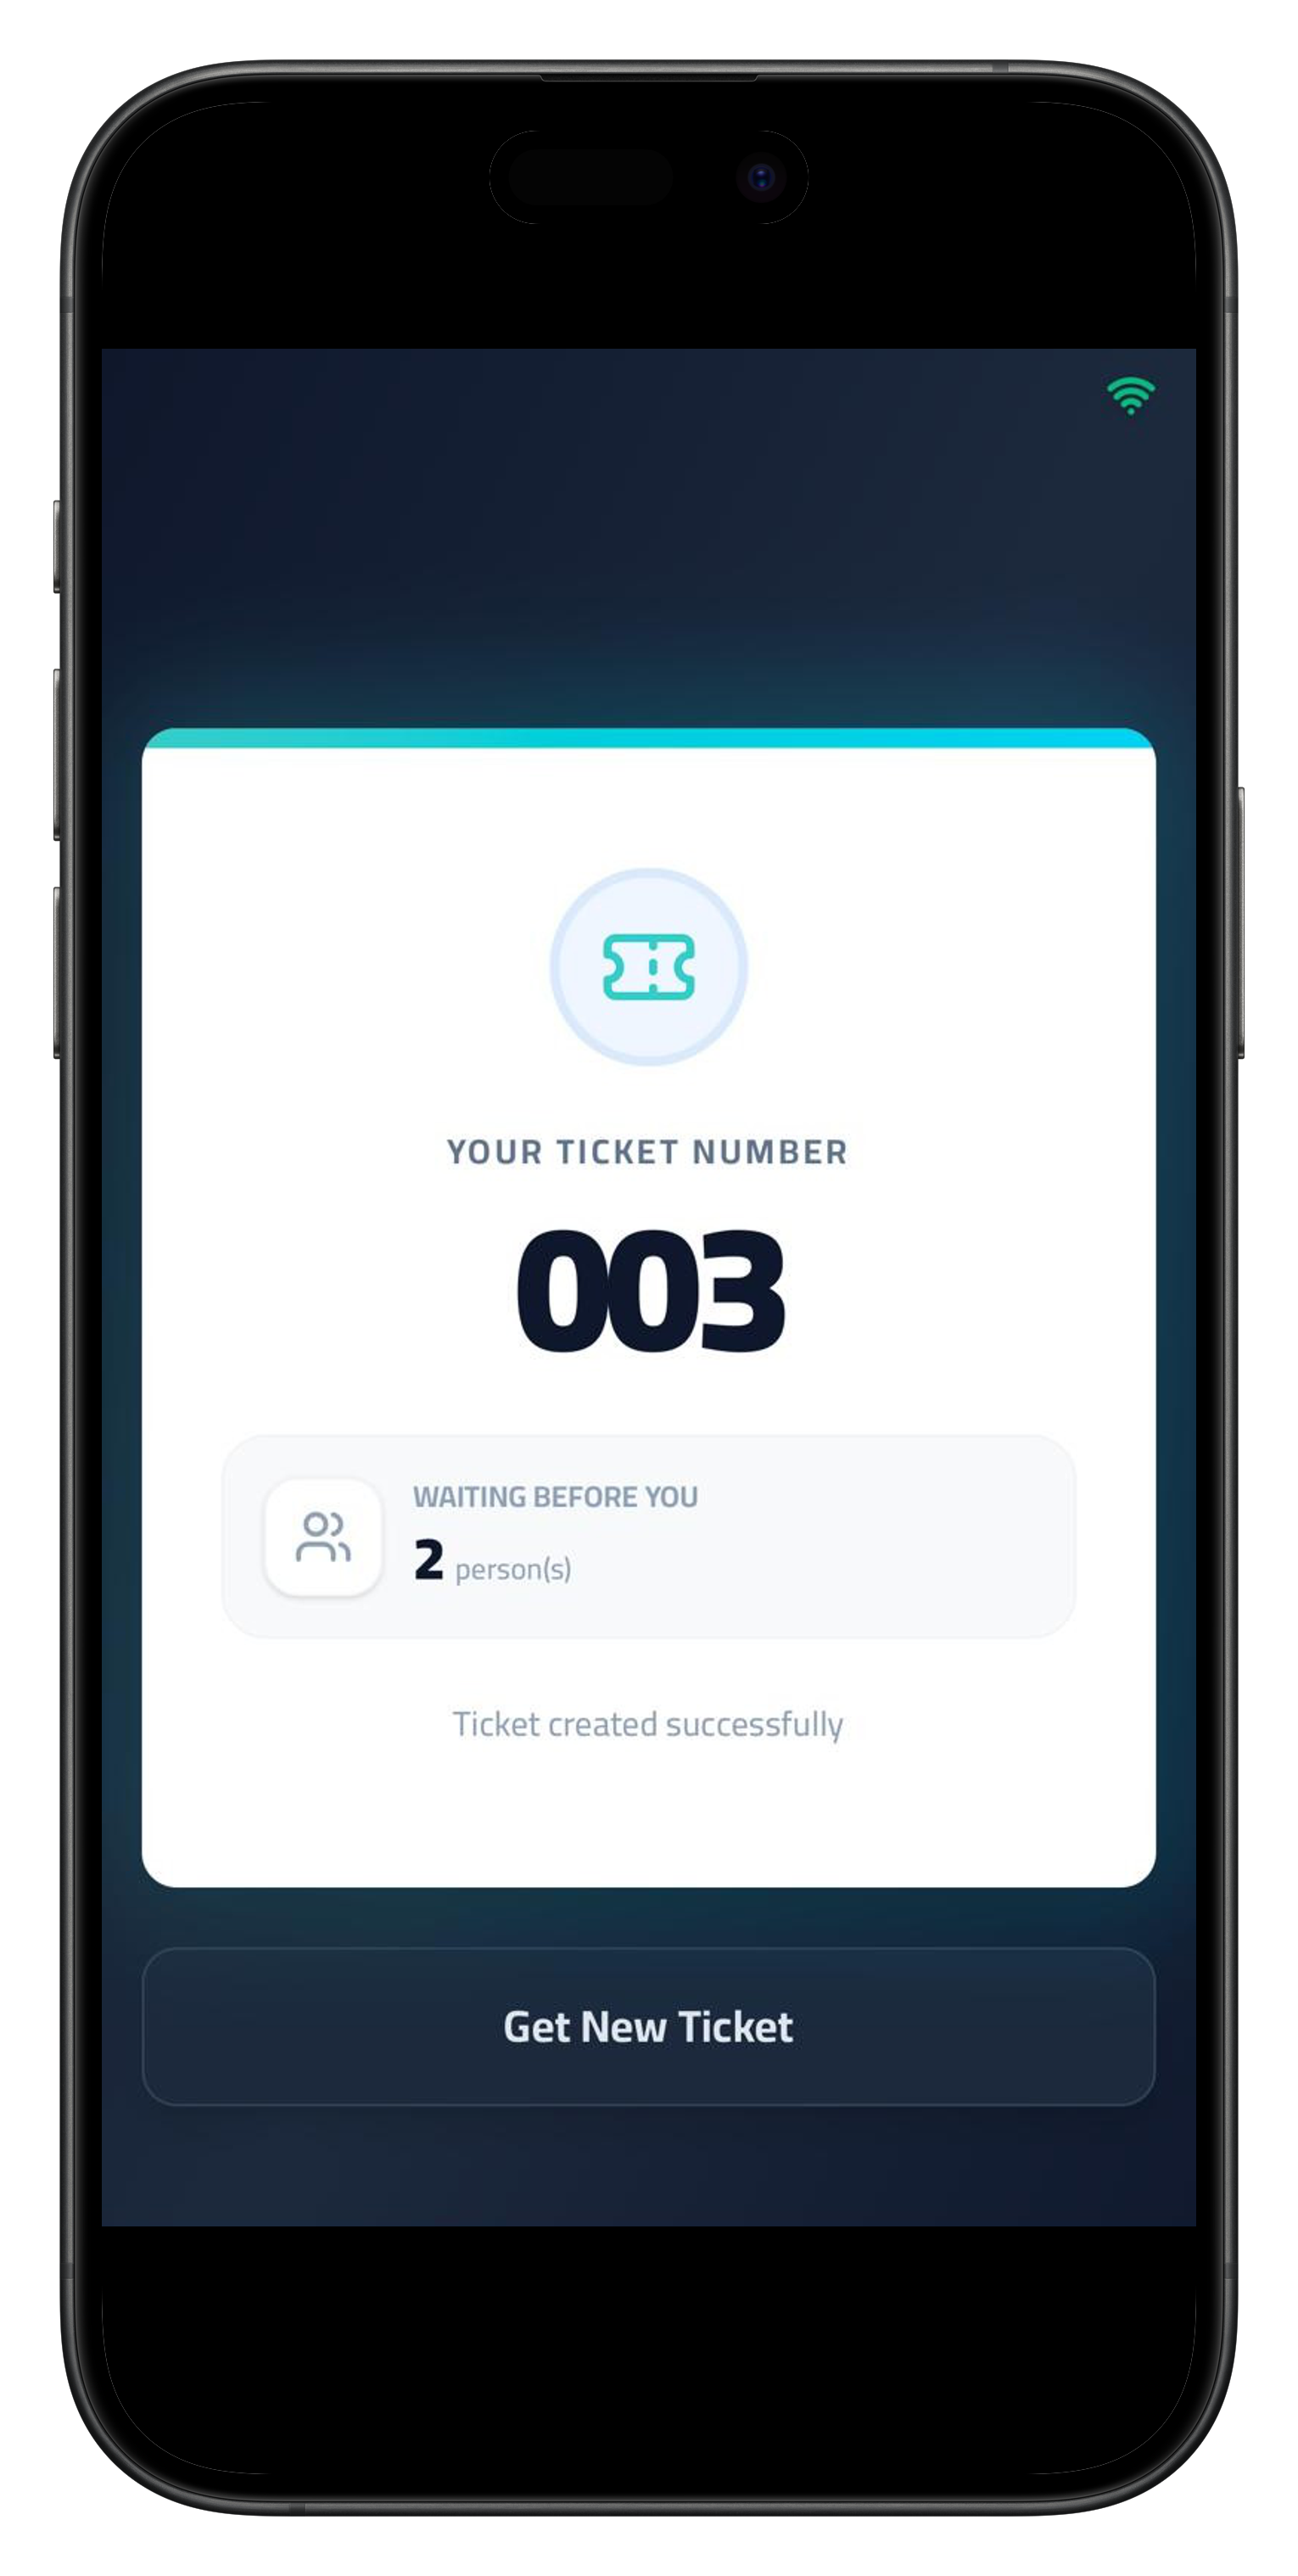
Mobile Access: Scan the QR Code to access the mobile queue.
- 4
Freedom to Wait: Encourage customers to scan the code. They can take a digital ticket and wait comfortably outside.
- 5
Real-time Tracking: They will see the live count of people ahead and get notified when their turn approaches.
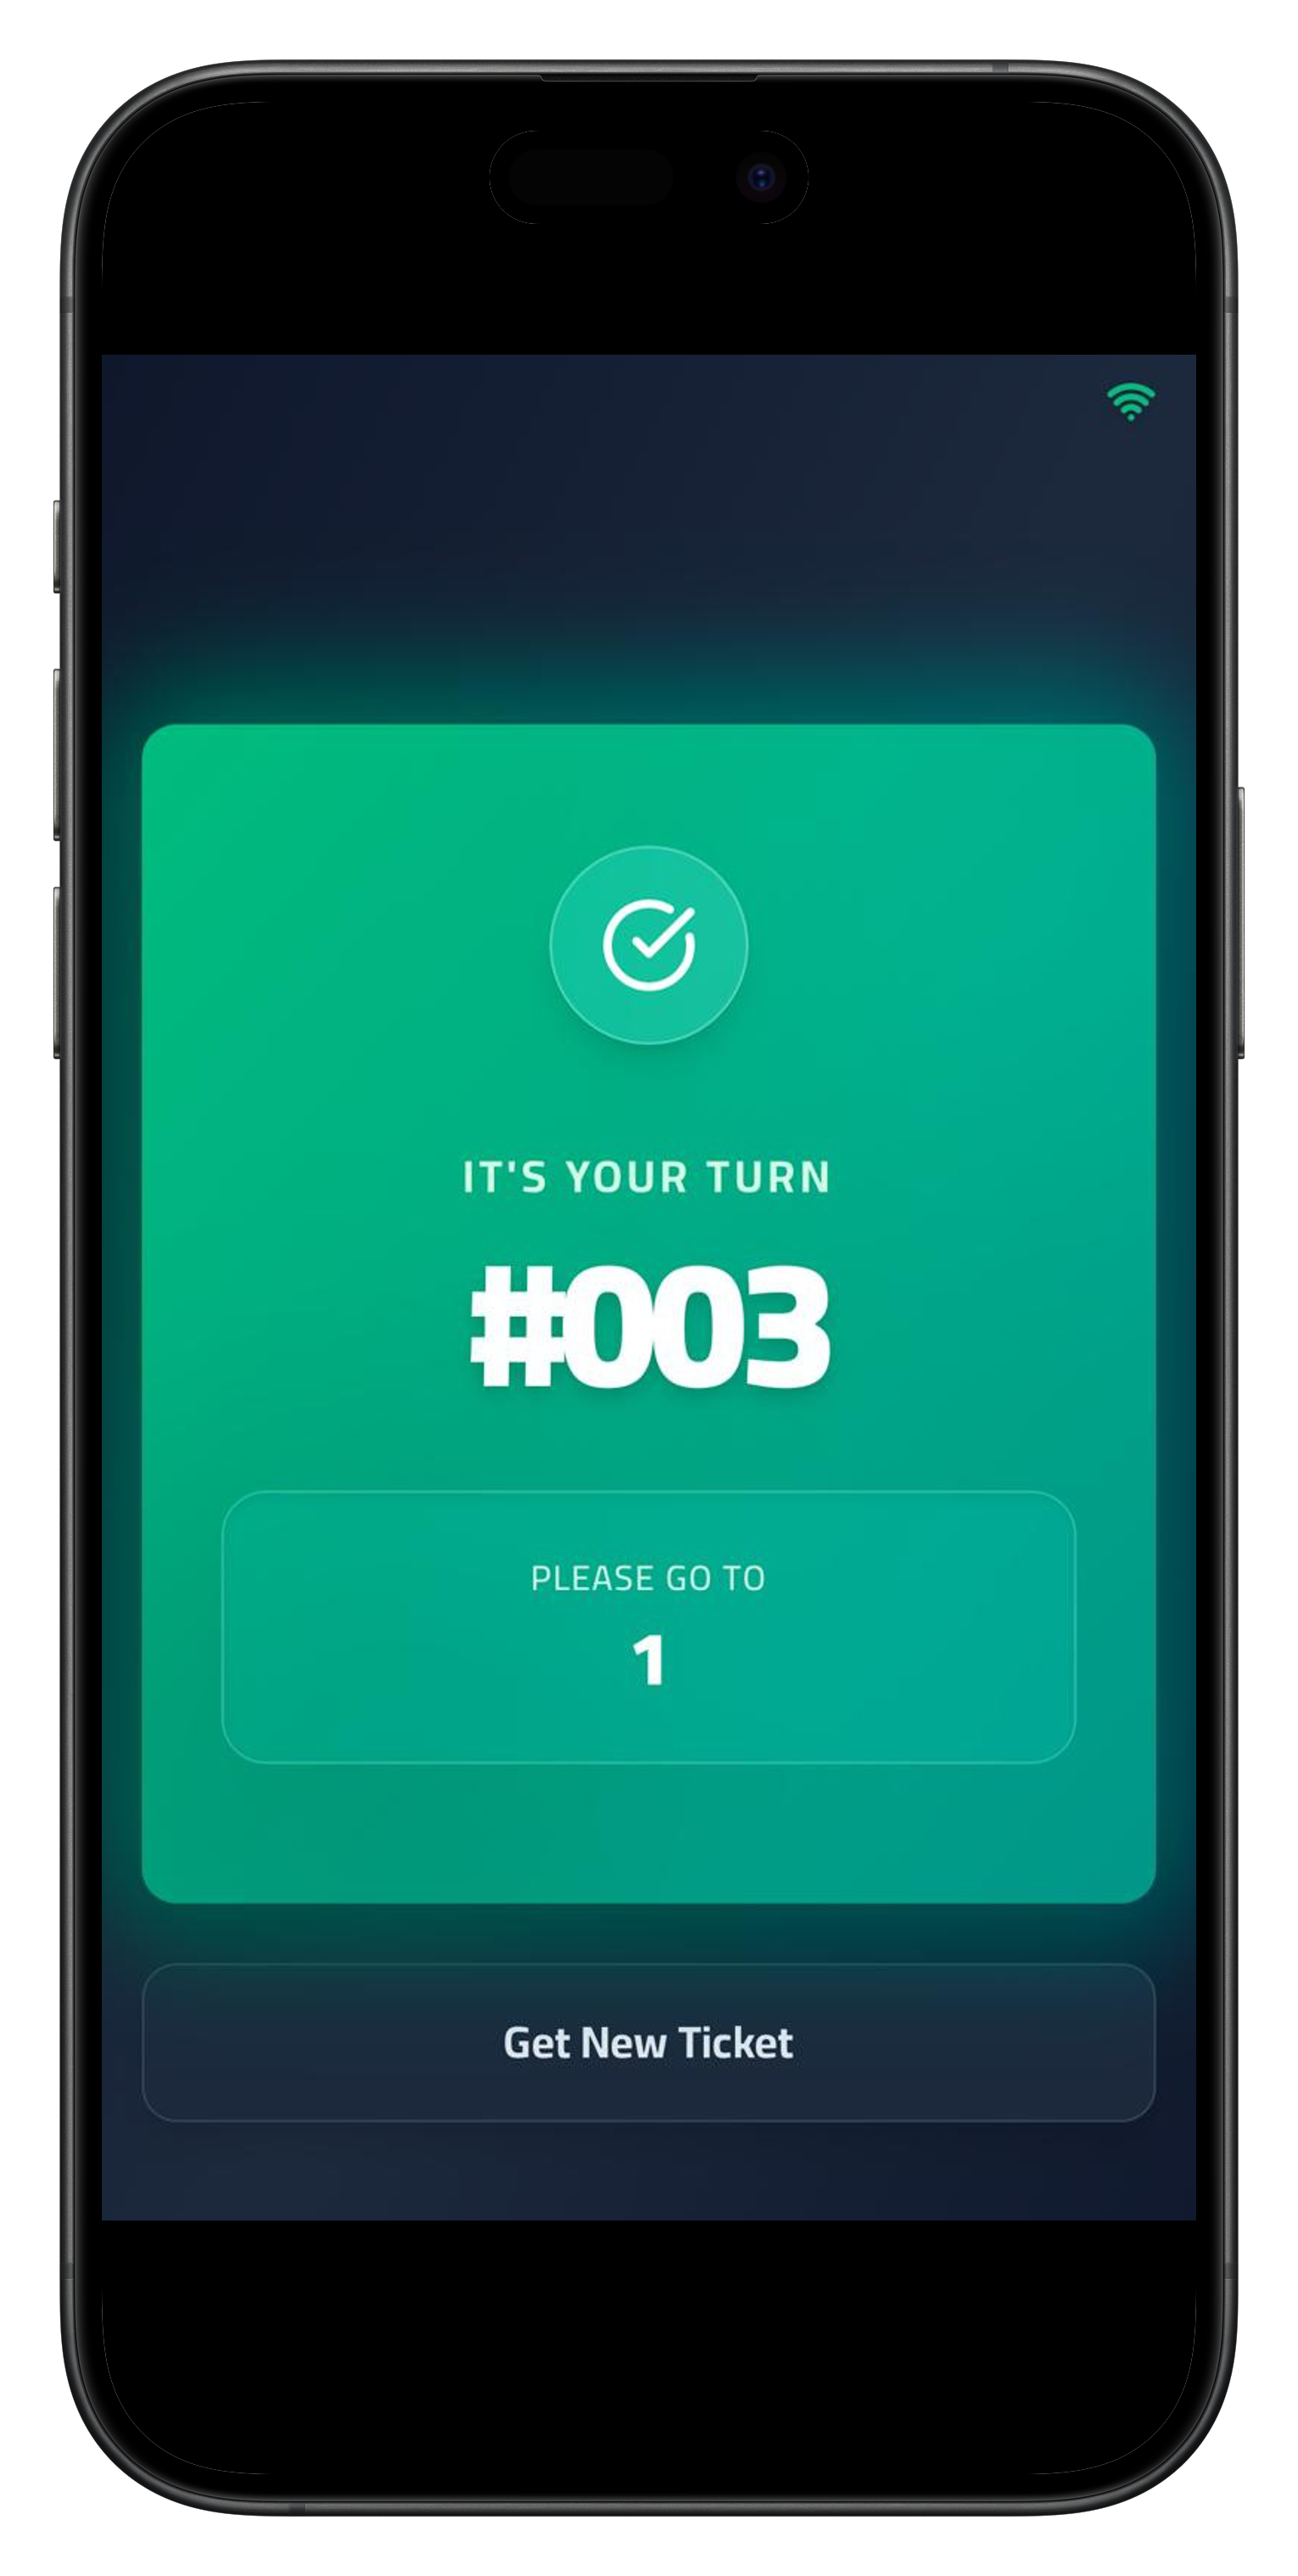
- 6
When the customer's number arrives, they will receive a notification and will be called to the specified window.
6. Staff Service Workflow
How your staff manages the flow of customers efficiently.
- 1
Staff Login: Employees log in to their dedicated serving panel.
Employee Login - 2
Call Next: Press 'Call Next' to announce the next ticket on the Display.
- 3
Queue Status: Monitor the 'Waiting' count to see pending customers.
- 4
Finish Transaction: You MUST click 'Done' after serving to clear the screen and close the ticket.
- 5
Hold/Recall: If a customer is delayed, click 'Hold' to serve the next person. You can 'Recall' them later from history.
7. Staff & Permissions
Create employee accounts and assign them to specific branches.
- 1
Go to 'Members' in the menu.
Manage Members - 2
Click 'Add Employee'.
- 3
Enter Name, Email, and Password.
- 4
Select the Branch(es) this employee can access.
- 5
Click 'Save Employee'. They can now log in using the Staff Portal.
8. Billing & Subscription
Manage your payments and download invoices.
- 1
Go to 'Settings' > 'Billing'.
Go to Billing - 2
Click 'Upgrade Plan' to subscribe or change your tier.
- 3
View billing history and click 'Download' next to any invoice to get a PDF copy.